Saturday, April 28, 2012

Caramelized Sunflower Seeds


       Sunflower seeds are one of my favorite toppings on salads. So a couple weeks ago I bought a huge bag of kernels just to have on hand. Although I've been sprinkling them over my lettuce, the bag doesn't seem to be emptying. I don't want them to go stale before I finish the bag, so I decided to look up a couple of recipes. I chose to experiment with these caramelized seeds because they are super simple--2 ingredients, 10 minutes. They're not amazing but they do bring variety to bored pallets. They're sweet and crunchy with a delayed flavor of being toasted seeds. Very interesting and unique. If I want I can still put them on salads, but their caramelization will add a sweetness I usually don't have. Really, how you use them is limitless. You could eat them as a plain ol' snack, sprinkle them over Greek yogurt, or even mix them in with pasta.


Caramelized Sunflower Seeds
Recipe from National Sunflower Association

Ingredients
1 cup sunflower seeds (just the kernels, not the shells, silly)
1/3 cup + 1 tablespoon brown sugar

*Can easily be increased or decreased proportionally.


Directions
--Cover a small cookie sheet with wax paper and set it aside for later.

--In a saucepan over medium-high heat, warm up the sunflower seeds for about three minutes. Stir frequently.

--Add the brown sugar to the saucepan and stir constantly until the sugar is melted. About another 3 minutes.

--Once the sugar is melted and the sunflower seeds are completely coated, spread the seeds evenly on the prepared cookie sheet.

--Let cool and enjoy.


Happy Baking!
--H

Saturday, April 21, 2012

Cajun Spice Roasted Chickpeas


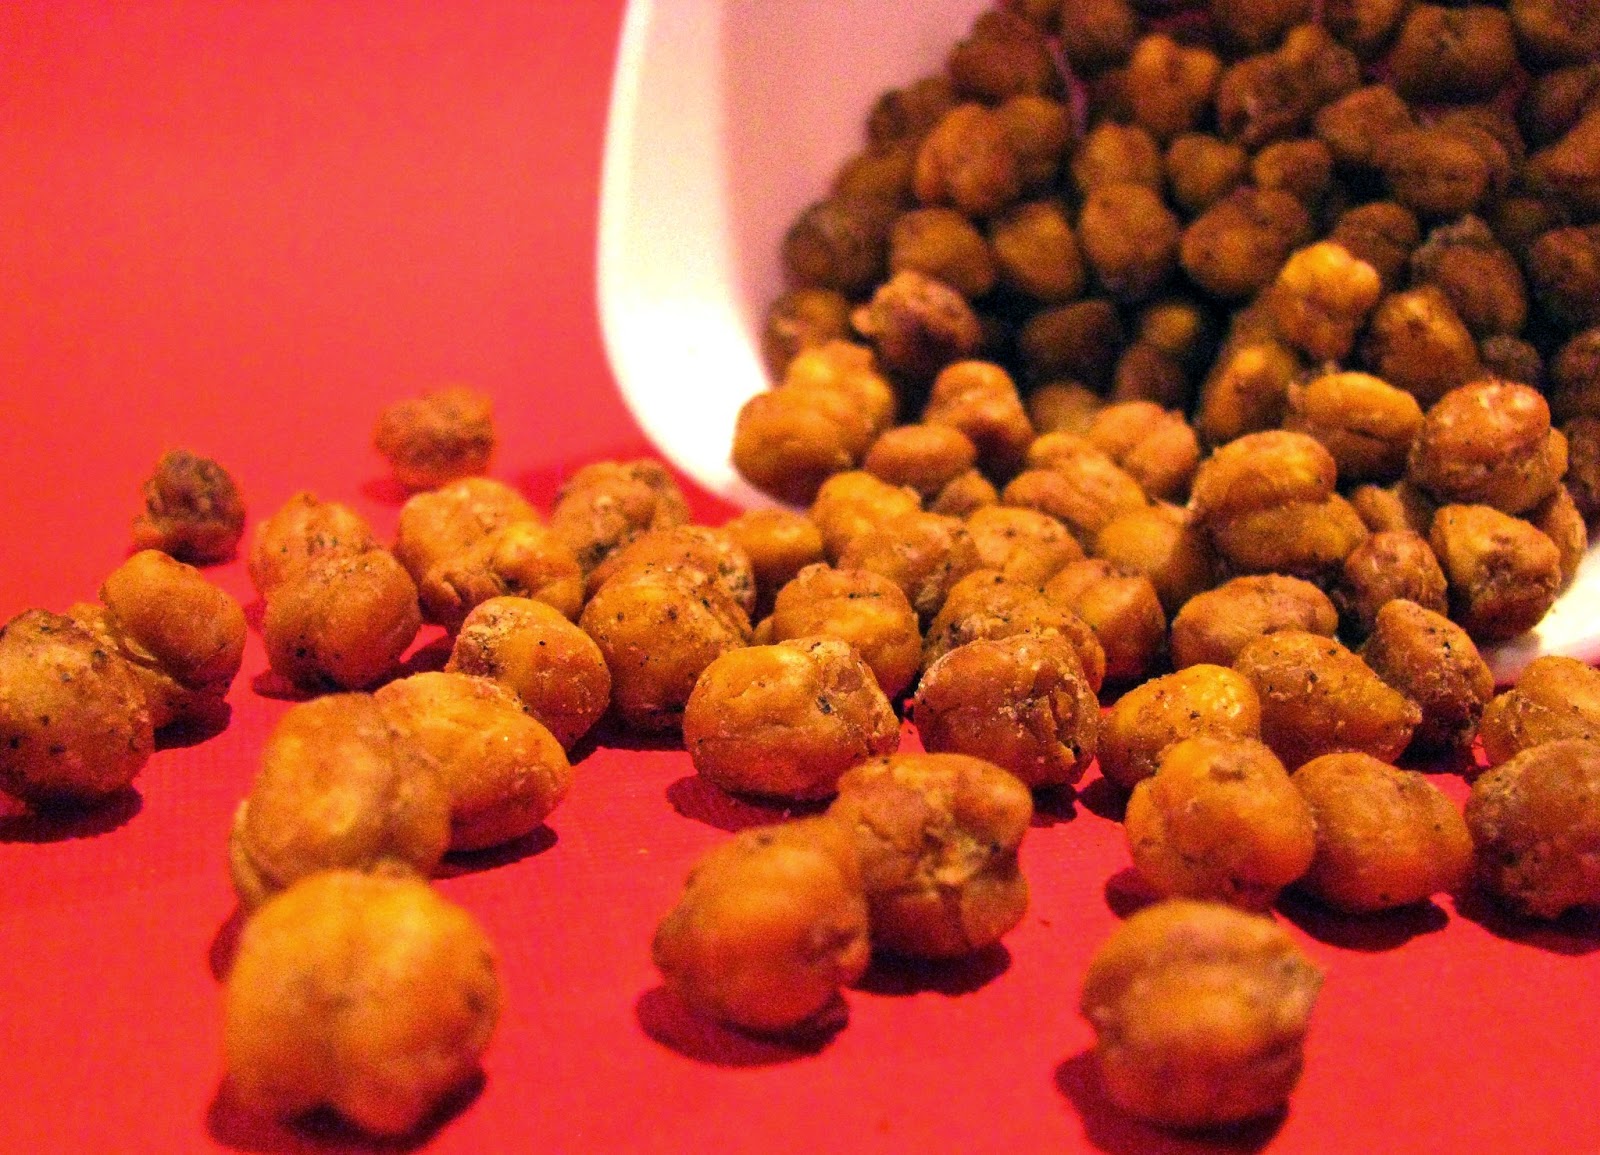
       How many times have you heard people say, "A peanut is not a nut, it is a legume"? Personally, whether someone says it aloud or not I always say it to myself while eating peanuts. Sometimes I annoy myself, but usually I'm entertained by the word "legume."  Anyway, just like peanuts, chickpeas (garbonzo beans) are legumes! And when you roast chickpeas they become hard--like peanuts! Just one big legume-loving family. So today when I wanted something salty like peanuts and found a can of chickpeas in my pantry, I decided to roast and salt them. At the last minute, though, I figured something spicy sounded good too. Hence, Cajun Spice Roasted Chickpeas. They're crunchy, salty, spicy, satisfying, and (with only three ingredients) super easy to make. You can eat them alone, put them on salads, or enjoy 'em with a cold one--they're perfect for that.


Cajun Spice Roasted Chickpeas

Ingredients

  • 1 (15 oz) can chickpeas
  • 1 tablespoon olive oil
  • 1/2 tablespoon Cajun seasoning (I used Tony's)


Directions
--Preheat the oven to 400 degrees Fahrenheit.

--Drain chickpeas in a colander and rinse them with water to get all the can-juice off of them.

--Dry the chickpeas thoroughly with a kitchen towl. You may notice that shells are coming off some of the chickpeas, you can leave these on or take them off, it doesn't really matter. I like to take mine off when I'm roasting small batches.

--Transfer the chickpeas to a smallish bowl, and toss them in the olive oil until completely coated. Then sprinkle on the seasoning and toss them again until evenly coated.

--Place the coated chickpeas onto a small jelly roll pan (or as I like to call it, "a cookie sheet with edges") and then put the pan in the oven.

--Bake for 40-45 minutes. Stir them a couple of times during baking. The chickpeas should be crunchy and have a bite to them. If they're still soft, keep them in the oven a little bit longer, about 5 minutes at a time.

--When done, let cool completely so you don't burn your mouth.

--Put them in a small dish and enjoy!


Happy Baking!
--H

Saturday, April 14, 2012

Kicked Up Brownies

Some days you just need a thick, moist, intoxicatingly chocolaty rich brownie. And by some days I mean days that end in "y"! But normally these delicious delights are not conducive to a healthy lifestyle and keeping the pounds off. Enter the Kicked Up Brownie; a brownie with a little cape, come to save the day. No refined sugar, extra dark chocolate, whole wheat flour, and some strong coffee: what's not to like?! You might not be able to eat the whole pan safely, but you could enjoy a square after a long week and not feel guilty about it.

THE GOODS:

1 cup very strong coffee or espresso

1/2 cup real butter (unsalted preferably)

1 1/2 cups Sucant or raw sugar

*Sucant (or Rapadura or Moscovado) is essentially pure dried sugar cane juice. It retains its molasses flavor so just be aware that it will give your brownies that flavor note*

3/4 cups extra dark cocoa powder (the higher quality the better)

2 eggs, beaten

1 cup whole-wheat pastry flour

1 cup dark chocolate chips (I used Guittard 60% dark)

1/2 cup chopped pecans, walnuts, or almonds

THE HOW-TO:

Pre-heat your oven to 350 degrees and spray a 9x9 inch baking pan with cooking spray.

Melt the butter in a medium saucepan over low heat. In a separate bowl, mix together the cocoa powder and the coffee until the cocoa is dissolved. Add this mixture to the melted butter. Slowly stir the sugar into the coffee and butter mixture, stirring until the sugar dissolves. Next add the eggs until just combined. Don't worry, they won't scramble on you, but it will get quite thick immediately. Remove the pan from the heat and fold the flour into the mixture until just combined. DO NOT OVERMIX. Fold the chocolate chips and nuts in. Again, do not over mix.

Spread the batter into the prepared pan and bake for 25 to 35 minutes, or until the top is no longer shiny. I baked mine for 35 minutes and the middle was still shiny but a toothpick came out clean so I took them out and they were extra moist in the middle and less so around the edges.

This makes 16 perfect little squares, which happen to be just the right size since they are so intensely flavored. With a cold glass of milk after dinner or cup of coffee at breakfast (yeah I said it), it's still hard to eat just one!


Life is better homemade-
L


Friday, April 6, 2012

Mini Coconut Cream Pie "Nests"


       As most everyone is well aware, Easter is almost here! I wanted to make something super cute to bring over to my Grandma's house for Easter Dinner, but with the end of the school semester fast approaching itself, I barely have time to make myself decent suppers. Chick cakepops, bird nest cupcakes, bunny butt cakes, Easter egg cookies--I wanted to at least make something. For two weeks now I've been trying to convince myself that I needed to work on my thesis instead of daydreaming over cute treats. Clearly, that didn't work so well. However! I did compromise between my need to use time efficiently and my desire to create something tasty and adorable: I made coconut cream pie nests! See, I've been seeing posts about cookie-nests, cupcake nests, and regular cake nests, but not once have I seen a pie-nest. Then it dawned on me--that's what I could make. Plus, it was super fast because of the convenient invention of ready-made pie shells.


Mini Coconut Cream Pie "Nests"

Ingredients
  • 1 package of mini graham cracker pie crusts (contains 6 crusts)
  • 1 package instant coconut cream pudding mix (3.4 oz)
  • 1 3/4 cups milk
  • whipped cream
  • 2 cups flaked coconut
  • mini robin egg candies

Directions
--Remove crusts from packaging and set them in a row on the counter.

--In a medium bowl, whisk the pudding mix and milk for two minutes, pour into the pie shells. You will have a little bit left over. Put that in a small bowl, refrigerate, and enjoy as a snack later.

--Refrigerate pies until firmly set.
--Meanwhile, in a saucepan over medium heat, continuously stir the coconut until golden brown. Make sure you pay attention: after it starts to brown it can burn quickly.

--When pies are set, spread a layer of whipped cream over the filling. Top with toasted coconut.

--Place about three mini eggs in the middle of the pies to make them look like nests, and you're finished!


Happy Easter!
--H

Monday, April 2, 2012

Long Island Iced Tea Cakes

      
       Spring is here and summer is on its way. What a better way to commemorate this exciting change in weather than with a refreshing cake? Yes, refreshing. These Long Island Iced Tea Cakes are just that. When my brother chose for us to make this recipe I can probably gurarantee that he wasn't thinking about the change in seasons, though. =) What makes these cakes, or cake if you choose not to cut it up right away, extra special is that after being baked with the equivalent of one Long Island Iced Tea they're placed on top of an additional soaking sauce. Because of this, they're given that extra freshing twist that only a Long Island Iced Tea could give. Just a heads up, though, if you don't have all of the ingredients already on hand making this cake could be become expensive.


Long Island Iced Tea Cakes


Ingredients
For the Cake
  • 2 cups cake flour
  • 1/2 teaspoon baking soda
  • 1/2 teaspoon baking powder
  • 1/4 teaspoon salt
  • 1 teaspoon vanilla extract
  • 1 tablespoon gin
  • 1 tablespoon light rum (as in Morgan Silver or Bacardi)
  • 1 tablespoon tequila
  • 1 tablespoon vodka
  • 1 tablespoon triple sec
  • 2 tablespoons freshly squeezed lemon juice
  • 2 tablespoons cold cola
  • 1 cup sugar, divided
  • 1/2 cup milk
  • 6 egg yolks
  • 1/2 cup (1 stick) unsalted butter, softened

For the Long Island Iced Tea Soaking Sauce
  • 1 tablespoon gin
  • 1 tablespoon light rum
  • 1 tablespoon tequila
  • 1 tablespoon vodka
  • 1 tablespoon triple sec
  • 2 tablespoons freshly squeezed lemon juice
  • 1 teaspoon sugar
  • 2 tablespoons cold cola
*note*: My brother and I decided to double this so the cake would have a more prominent flavor.


Directions
--Preheat your oven to 350 degrees Fahrenheit.

--Grease and flour a 9"x13" cake pan and set aside.

--In the bowl of your stand mixer, whisk the eggs yolks until they become thick and pale, about 5 minutes. It may seem like they'll never change, but trust me, they do become a very light pastel yellow. (While these are beating, jump ahead and do the flour and liquid mixtures.)

--Once the yolks have reached this consistency, add a 1/2 cup of sugar and continue to beat the yolks until they form a thick ribbon when the whisk attachment is lifted.

--When this consistency is reached, add the butter and remaining 1/2 cup of sugar (minus a teaspoon for the liquid mixture.

--Meanwhile, in a separate medium-sized bowl, whisk together the cake flour, baking soda, baking powder, and salt. Set aside for now.

--In a glass liquid measuring cup, combine the vanilla, gin, rum, tequila, vodka, triple sec, lemon juice, cola, 1 teaspoon of the sugar, and milk. The milk will curdle, don't worry about it. Set aside the liquid mixture for now as well.

--When all three mixtures are done (egg yolk, flour, liquid), switch the whisk attachment to the beater attachment on your stand mixer and gradually beat in the flour and liquid mixtures in alternating additions (flour, liquid, flour) until everything is thoroughly combined. Try not to overbeat the cakebatter.

--Pour the batter into the prepared cake pan and bake for 20-22 minutes, or until a toothpick comes out clean when stuck in the middle of the cakes. (My cake took 25 minutes to bake.)

--Let the cake sit for a couple minutes in the cake pan, then flip it out on a cooling rack. Let the cake completely cool.

--While the cake is cooling, prepare your soaking sauce by combining the gin, rum, tequila, vodka, triple sec, lemon juice, sugar, and cold cola in a large glass. To prevent chances of spilling, place the glass into the fridge.

--Cut the cake into small squares. I ended up with 36, but depending on your size you could have more or less.

--Pour the soaking sauce in the (freshly cleaned) 9"x13" pan, then replace the cake squares in the cake pan on top of the sauce.

--You're going to want to let the cake soak up the alcohol for about 30 minutes to an hour. My brother and I wanted to make sure the cake squares didn't have soggy bottoms, so after a few minutes of letting the cake soak, we flipped the cake over (with the pan still covering it) onto a different platter so the alcohol would percalate down throughout the entire cake squares, and not just stay in the bottom half.

--Share with friends and enjoy! Remember, please bake and eat responsibly. ;)


Happy Baking!
--H